If you have a hole or thin spot in your felt you may think that your goose is cooked for this felted project. Perhaps you have other projects piled up in a drawer that need to be fixed but are too discouraged to show them the light of day and give it a go at fixing them? Well, here is some good news, holes and thin spots are easy to fix, much easier than knitted or cloth fabric. In this short guide, I’ll cover how to prevent holes from occurring in the first place, and how to fix them, either during or after felting, if they do occur.
Disclosure: This information may contain affiliate links which means if you click and buy, we may receive a small commission at no extra cost to you. See full Disclosure for details.
Preventing holes and thin spots
Prevention is better than a cure. So, although this guide focuses on repairing these problems, I want to cover how to prevent them in the first place.
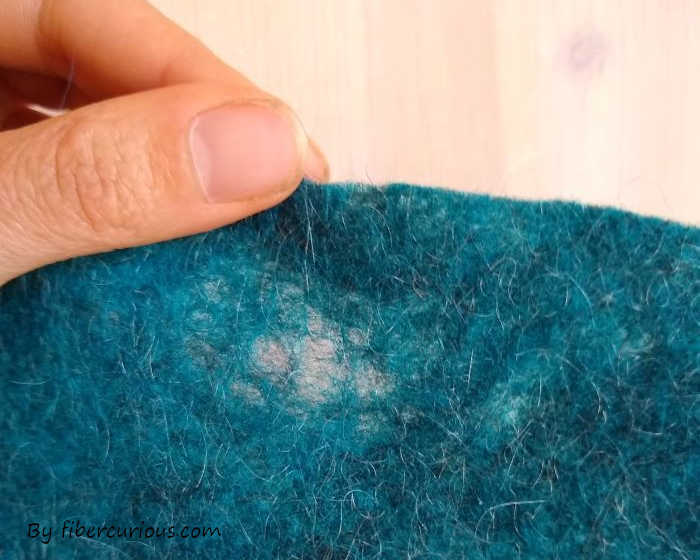
Repairing a hole or a thin spot in your felt can be done during the felting process or after. The best time to catch a thin spot is while you are laying out your wool. Check with your finger tips after you place your final layer on, gently press down on every bit it with your eyes closed and consider whether it is thinner than the rest.
Then when you wet down the wool closely inspect it for thin areas, if you see your felting mat or template underneath, now is the time to add more wool to that area.

The next precautionary measure is to be gentle in your felting, being to aggressive with your rubbing in the early stages is a sure way to form a thin spot or hole.
Holes and thin spots can still occur later on, but these three measure are a good way to prevent it from occurring.
Fixing by felting
If you are in the process of felting and you notice a thin area focus your rubbing on the area. It seem counter intuitive, but applying GENTLE pressure and agitation to the area will cause the most felting in that area, and will draw the fibers in to thicken it up in that spot.

Fixing by needle felting
If you’re beyond that stage, it is time to so one of two things: get the needle felting tool out or your hand carder. If your felt piece is thin, delicate or has a design, I recommend using a felting needle, as a hand carder would likely make the problem worse. Alternatively, if your felt is large, thick and plain, I recommend using a hand carder as it will be faster to fix. To fix a thin spot with the felting needle, turn your felt inside out or back to front. Use the same colour wool on the back and needle felt it in until it is as thick as the rest of the felt. Turn it over and do the same on the front if you need to fix up the design. Once that is done, keep wet felting so that it blends in with the rest of the felt.

Fixing by carding
To use the hand carder, turn the felt over and brush the felt over the thin spot, the fibers will be loosened and should look woolly. Do this over and around the thin spot. It may create a hole, but don’t worry. Once that is done, lay more of the same wool over the fibers and wet felt it in. If your felt is gone beyond the pre-felt stage be careful not to add new fibers beyond the boundary of where you carded or you may create an odd seam in your felt.

Other felting articles you might be interested in
If you found this information useful, you might be interested in check out these other articles. How to fix wavy and wonky edges on your felting fabric, and 10 felting hacks that will salvage any unsuccessful felting project.
Be the first to leave a comment