If you are wondering how to make prefelt, this tutorial has everything you need to know. The easy step by step instructions will walk you through the process. You also learn how to use prefelt, among other helpful tips. Using prefelt will give you better precision in your wet felting and needle felting projects. and reliable results you need to start using prefelt, it will help sharpen your images and keep your edges crisp.
Disclosure: This information may contain affiliate links which means if you click and buy, we may receive a small commission at no extra cost to you. See full Disclosure for details.
What is prefelted wool?
Prefelted wool is a sheet of partially felted wool, the felting process is ended before the fibers have completely felted. The wool fibers have begun to interweave but only loosely and they are still able to incorporate more wool fibers into the fabric. The prefelt has not shrunk or thickened (a process known as fulling the felt). Prefelt can be made by wet felting layers of wool, or needle felting it. Commercial prefelt is done by needle felting and sometimes called needle punched prefelt. Prefelt can be used in other felting projects as it will still reliably felt to other fibers.

Prefelt should not be confused with other types of processed wool, such as wool batting or wool top. If you would like to know what the difference is between them, check out Wool batts vs prefelts – the Q&A sessions.
How to make prefelt
Tip: If you are a beginner to wet felting, please review Wet felting for beginners as the instructions are explained in greater detail. However, if you have felted before, then carry on with this felting tutorial.
Supplies needed

![]() Felting mat (such as a solar pool cover or bubble wrap)
Felting mat (such as a solar pool cover or bubble wrap) ![]() Ball sprinkler or spray bottle
Ball sprinkler or spray bottle ![]() Pool noodle (optional)
Pool noodle (optional) ![]() Mesh screen
Mesh screen ![]() Large bowl
Large bowl ![]() Liquid soap (I used Murphy’s oil soap)
Liquid soap (I used Murphy’s oil soap) ![]() Plastic bag
Plastic bag ![]() Plastic sheet
Plastic sheet ![]() Towels
Towels ![]() Sharp scissors (optional)
Sharp scissors (optional) ![]() Sponge (optional for soaking up water)
Sponge (optional for soaking up water)
Supply notes: ![]() I use an 8 cm diameter pool noodle
I use an 8 cm diameter pool noodle
![]() Pail should hold about 4 L
Pail should hold about 4 L![]() A plastic shopping bag will do
A plastic shopping bag will do![]() I used a thick plastic pillow case bag for the plastic sheet
I used a thick plastic pillow case bag for the plastic sheet![]() The towels are for under the felting mat and one for drying your hands
The towels are for under the felting mat and one for drying your hands ![]() Don’t use a blunt scissors for cutting the prefelt as it will pull the fibers out.
Don’t use a blunt scissors for cutting the prefelt as it will pull the fibers out.
Chose your fibers and colours
For making a prefelt, I suggest using merino felting wool. If you are looking for a variety of colours and fibers, I recommend a fiber sample pack such as the 7 oz assorted merino roving and mixed fiber sample pack. Adding silk top like I did is totally optional, but it does add a beautiful texture and luster to the felt. If your are interested in giving your prefelt some depth, I recommend mulberry silk fiber.
Tip: The colour combination you use for you prefelt is important. Using good complimentary or contrasting colours can really make your prefelt pop out. ![]() Check out how to use a colour wheel for some guidance on this.
Check out how to use a colour wheel for some guidance on this.

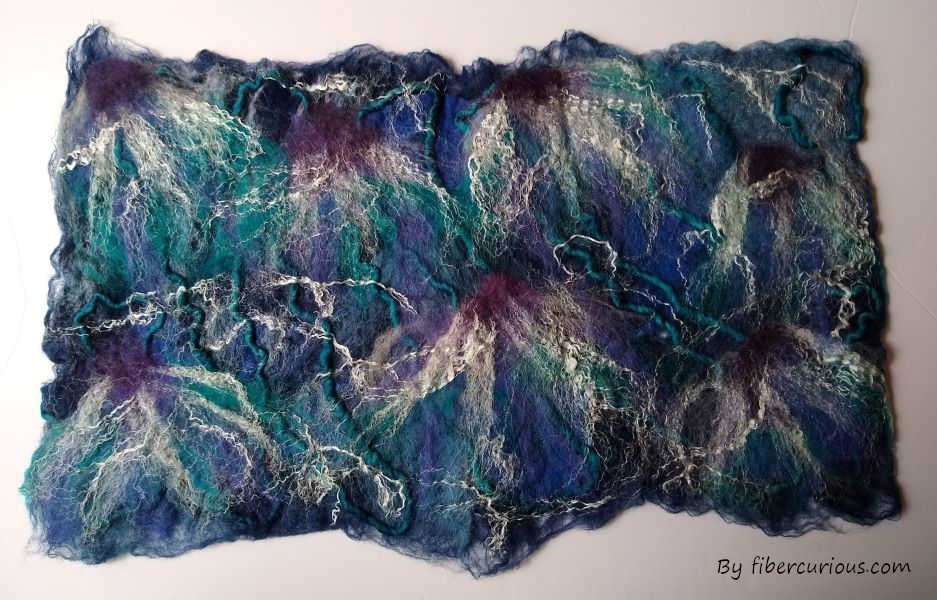
As you can see I used many different varieties of colours in the blue family. I also used yarn and white silk top to embellish the felt.
Directions
Step 1. Getting set up
![]() Place your towel down and then your felting mat on top. Add a few tablespoons of liquid soap to your bowl or pails and fill it with hot water.
Place your towel down and then your felting mat on top. Add a few tablespoons of liquid soap to your bowl or pails and fill it with hot water.

Step 2. Lay the wool
Pull small ‘shingles’ of wool from the roving and lay them out in overlapping rows to recreate a large rectangle. If you would like more details on how this is done, please refer to step 4 and 5 in Wet felting for beginners. Two layers of wool is enough for a prefelt (use 3 or 4 if you want a thick prefelt). I like to make my first layer one solid colour, often a contrasting or complimentary colour, to give the prefelt shape a border colour when it is felted into it’s final destination.

After you make a base layer for the prefelt, add wool decorations, including yarn and silk

Tip: Don’t worry about getting perfectly straight edges, you’ll end up cutting the prefelt up into various shapes, so it doesn’t matter how the edges turn out. Also don’t worry about the pattern you create, try to have fun with it and not worry too much.
Step 3. Wetting the wool
![]() Lay the fly screen gently over the wool and make sure it covers all edges. Using a spray bottle or your water sprinkler, wet the wool.
Lay the fly screen gently over the wool and make sure it covers all edges. Using a spray bottle or your water sprinkler, wet the wool.

Step 4. Spreading the water
To spread the water and soak all the wool, take a plastic shopping bag and scrunch it up into a ball. Gently rub the shopping bag around the top of the fly screen to spread the water, adding little or no weight to bag. The fly screen should not move. Do this for about 1 minute.

Step 5. Soak up excess water
![]() To remove excess water lay a towel down over the fly screen and gently press down. We want to leave some water behind so that the wool is wet but not enough that is leaking from the edges.
To remove excess water lay a towel down over the fly screen and gently press down. We want to leave some water behind so that the wool is wet but not enough that is leaking from the edges.

Step 6. Rolling
![]() Gently roll the pool noodle over the wool. This will evenly spread the soapy water and add pressure to help create that felted ‘skin’ on the surface of the wool. Do this for about a minute.
Gently roll the pool noodle over the wool. This will evenly spread the soapy water and add pressure to help create that felted ‘skin’ on the surface of the wool. Do this for about a minute.

Step 7. Rub the wool gently
![]() Remove the mesh fly screen and place the felting mat and plastic sheet over the wool. Add a bit soapy water to the top of the plastic and spread it around with your hands. It is important to add gentle pressure as you rub the piece without moving the bubble wrap or plastic.
Remove the mesh fly screen and place the felting mat and plastic sheet over the wool. Add a bit soapy water to the top of the plastic and spread it around with your hands. It is important to add gentle pressure as you rub the piece without moving the bubble wrap or plastic.

Do this until the wool fibers have begun to felt together, to confirm, life the plastic up and pinch the top fibers. If the fibers have begun to interlock with one another, you are doing well.
![]() Once you have a fabric that stays together as one piece, you are done. Congratulations on your beautiful prefelt!
Once you have a fabric that stays together as one piece, you are done. Congratulations on your beautiful prefelt!

![]() Warning: If you felt too much you might not be able to use the fabric in other felting projects as the fibers will felt too tightly together to let other fibers interweave into the felt.
Warning: If you felt too much you might not be able to use the fabric in other felting projects as the fibers will felt too tightly together to let other fibers interweave into the felt.
Tip: The degree to which you felt your prefelt affects how it looks when you use it in another project. It will blend in, and have softer edges, if your prefelt is only slightly felted. The more felting your prefelt has had, the more distinct the edges will be when you cut it out and felt it onto your base wool layer.
How to use prefelt for wet felting
Prefelts can be wet felted, or needle felted, into other prefelts or unfelted wool. First, come up with a shape that you would like to cut from your prefelt and then carefully cut it out. Lay the prefelt shape on your unfelted wool or another sheet of prefelt and start felting.
I’ve used prefelts in my other tutorials for adding decorations to dryer balls, and felted soaps


If you would like more details on how to plan a felting project using prefelted wool, take a look at Designing a felted object using prefelts. In this tutorial, I provide free felting patterns and detailed instructions on how you can use with your prefelts, including walling hangings and 3D objects.
Tip: Make prefelts as a way to relax and unwind. They require little planning, thought or effort, and are great to have waiting around to be used up when you suddenly get a jolt of felting inspiration for the perfect felting project.
Where to buy prefelt
You can buy prefelts if you’re not too keen on making your own. These prefelt can be cut into shapes and laid on prefelted or unfelted wool. Alternatively, you can use the prefelt as a background and lay your wool decorations on it and felt it that way.
Other tutorials you might like


Be inspired by other fiber artists
There are lots of fiber artists out there doing really magical things with prefelt, and although they aren’t offering free tutorials on how they made their felt, they do give away some great hints. Also, a lot can be deduce from looking at their photos. Maria Friese has done some fun experimenting with her prefelts making reliefs, as has Andrea Noeske who creates graphic effects using prefelt inlays.


Follow along on YouTube instead
If you would prefer to watch a video on how to make a pre-felt, check this video out
Be the first to leave a comment